It has been raining here in PA and it is chilly today.We have been spoiled by 80 degree temperature for a couple of days. But shouldn't complain as we need more water. Anyway weather is not something we can control, so I will take everyday as it is.
To make my day even better yesterday night suddenly my daughter requested for a hello kitty purse.Now for a little girl she is demanding, but it gave me a reason to try something new. So I searched for a purse pattern and found one here but it did not have any instructions so I kind of went with my instincts and made my own tutorial.
I will try to explain it as detail as possible....here is the tutorial.
Tutorial for Hello Kitty Purse:
For this purse I went through my stash of scrap fabric and I found all I need.I let my daughter pick her choice of fabric and she is good.
For the body which is white I used a fabric which is soft to touch and feels like fur (this is the same fabric that used to make my daughter's cape when she was a year old)
For inner lining I used a
thin iron on backing and pink fabric. I used the backing for the fabric to be stiff.
Step 1: Print out the pattern from HERE.

Step 2: Cut 2 of each for lining and for body.If you want you can choose any color fabric.

Step 3: Cut the backing fabric for the lining .

Step 4: Iron the backing fabric on to the pink lining fabric
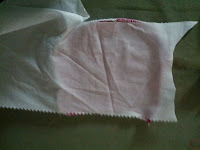
Step 5: Cut the strip for the handle. I doubled it as I wanted it all around . Pin all the pieces together.

(sorry about the picture and I think I missed taking some more pictures)
Step 6: I serged all around and on 3 sides and then on the top I just folded them a little at the edge and sewed it.

Step 7: Turn everything inside out and now you should have a purse without any face (I forgot to take a picture)
Step 8: As in the printout cutout 2 eyes with black fabric (I used black fleece from my scraps) 1 cutout yellow for nose and some strainght strips from black fabric for whiskers. I didn't want them to be stitched so I used fabric glue and glued them all in place.For the bow I used red felt and sewed it.
I hope you can all understand my tutorial. If any doubts please do leave a message.
Step 9: This is how the final product looks.( I left the top open, she didn't want it closed on the top) I can always close it with velcro or zipper in future.

After this I have one happy customer :)
Thanks

The purse looks so cute.
ReplyDelete